In the past 5 years, internet traffic originating from mobile devices has risen from 0.9% to an astounding 15%. That makes it imperative to have a basic level of support for mobile users in everything you build online. Even though there are new tools and technologies to make that easier, there are still many issues that need to be solved. One of the most common issues is finding devices on which you can test your creations. It simply isn’t feasible to individually test on many of the thousands of internet capable devices. Therefore, the best solution is to find a suitable option to test your creation even without a device. To this end, mobile device emulation has begun to emerge in the past few years. With emulation, you can virtually test a wide range of devices on your desktop with small browser extensions, subscription services, or full device simulators available in Xcode or the Android SDK. These options are better than nothing but there are still some challenges to overcome like memory space and price.
The latest version of Google Chrome comes equipped with an impressive built-in Mobile Device Emulatior as part of its DevTools debugging kit. With a set of great features,the tools are free and built right into Chrome. It is much lighter than Xcode with similar comprehensive plane of functionality.
How to Enable Device Emulation?
Here is a quick rundown on how to enable and use Chrome’s mobile device emulation features.
• Open DevTools – Menu>View>Developer>Developer Tools
• Click on the Gear icon near the right-hand side of the DevTools menu bar to open DevTools Settings

• Click on the Overrides tab
• If you’re using Chrome Canary browser, look under the heading “Appearance” in the General tab
• Select “Show ‘Emulation’ view in console drawer”
• Close Settings
This will start up the device emulation features. To get to them, you have to open the console drawer and look up the new tab titles “Emulation”.
Emulating a Mobile Device
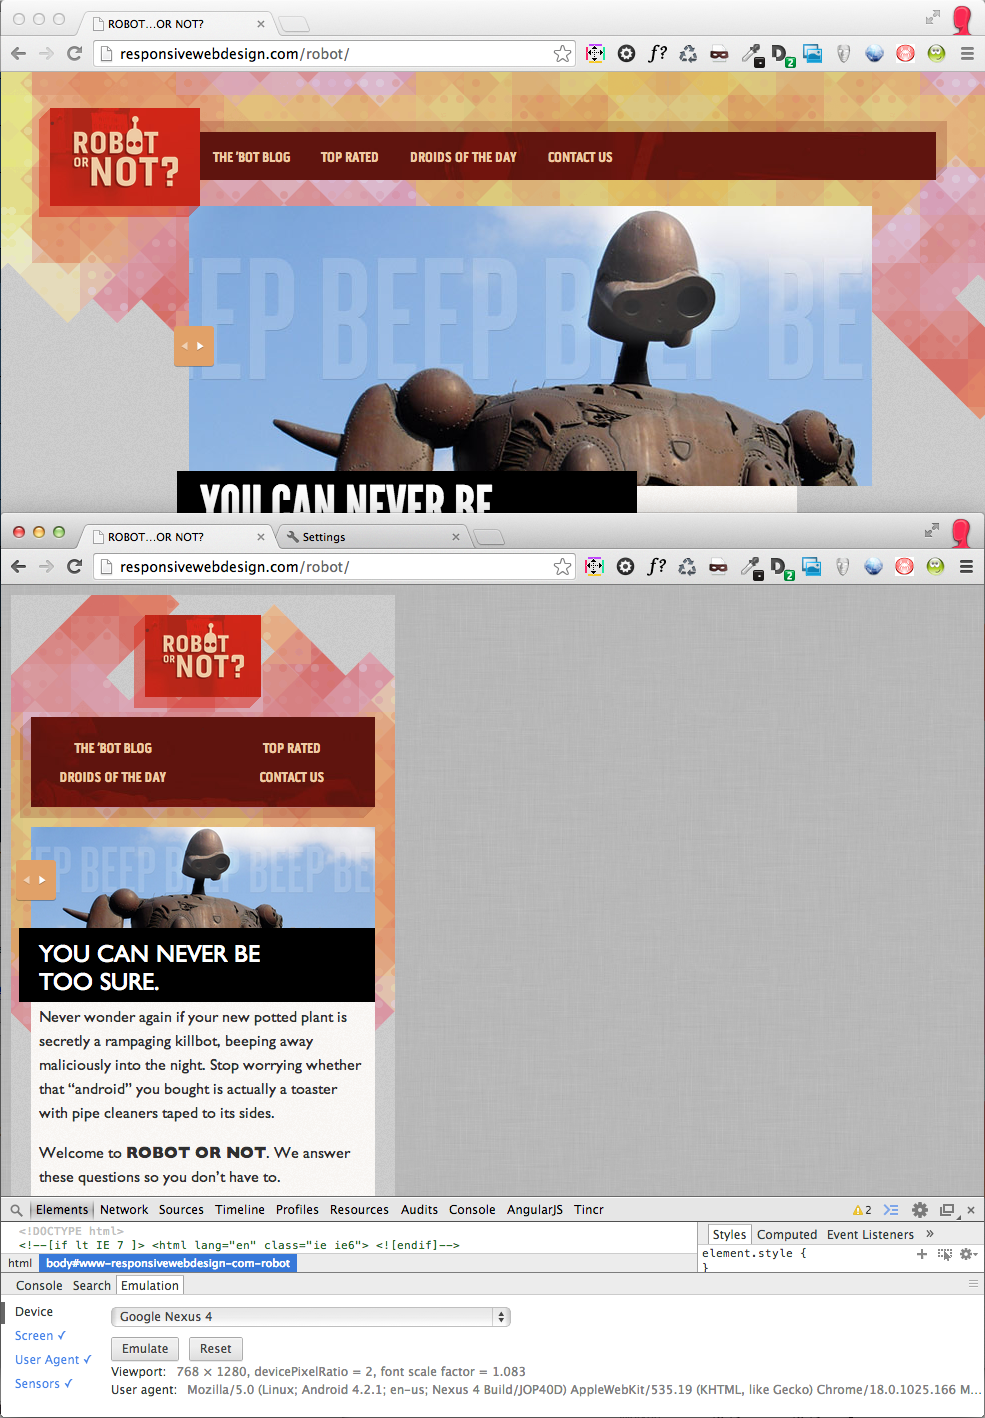
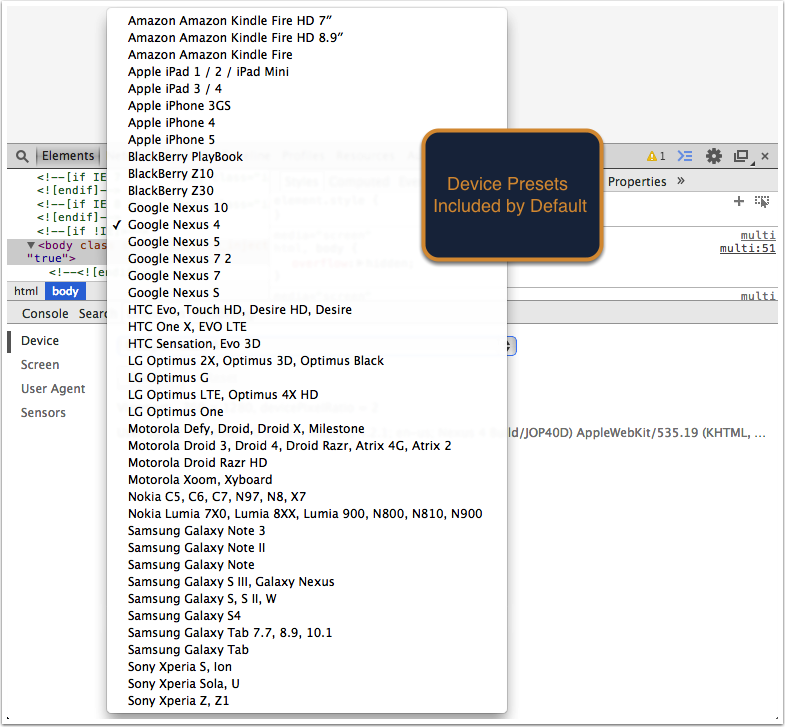
As soon as you open the “Emulation” tab, the tab “Device” on the left side should be selected by default. You can then select a device from an impressive device list, which will then display a few main data points specific for that device, which Chrome will start to emulate. At this point, you just need to click on the emulate button and Google Chrome will resize its new view and reload the page like it would be on the device you selected. Emulating a device will start a standard set of operations, by default, which you can then add or remove as you fine tune the settings.
Manipulating Emulated Device
Take a look at the left side of the Emulation tab and you can see as well as customize all available properties that Chrome uses to emulate your selected device. The “Screen” section is very useful while the “Sensors” section is the coolest. The customization option gives you a very important added benefit. Even though the list of devices is very impressive, there still might be some devices missing. However, if you know the specifications of a missing device, you can still test it with the customization option.
Screen Properties
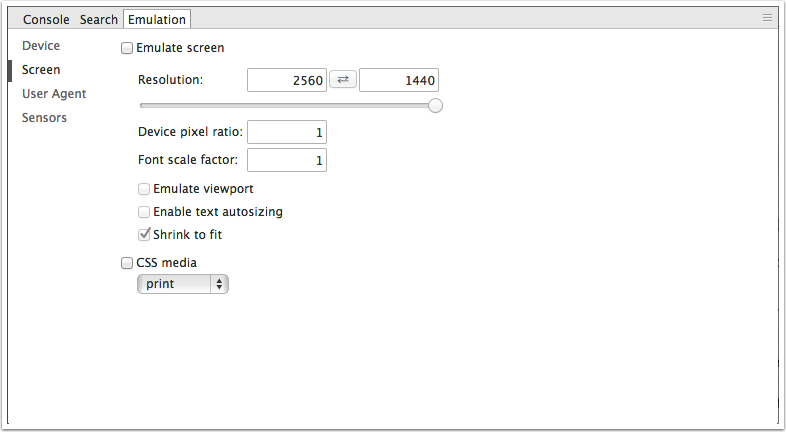
The “Screen” section allows you to fine-tune how Chrome emulates the display of your selected device. The resolution will automatically match the selected device as soon as you choose it. When emulating tablets, the resolution values will be set as per Landscape orientation, and in Portrait orientation when emulating a mobile device, which you can change by swapping the resolution values. Swapping the values will make the device viewport appear as if it has been rotated. This means the any styling that uses breakpoints should behave normally. On the other hand, if you have JavaScript running to detect any orientation change in iOS, there won’t be any change as there is no accelerometer activity when you swap resolution values. If you enable the “Shrink to fit” option, it may override the resolution values.
Changing User Agent
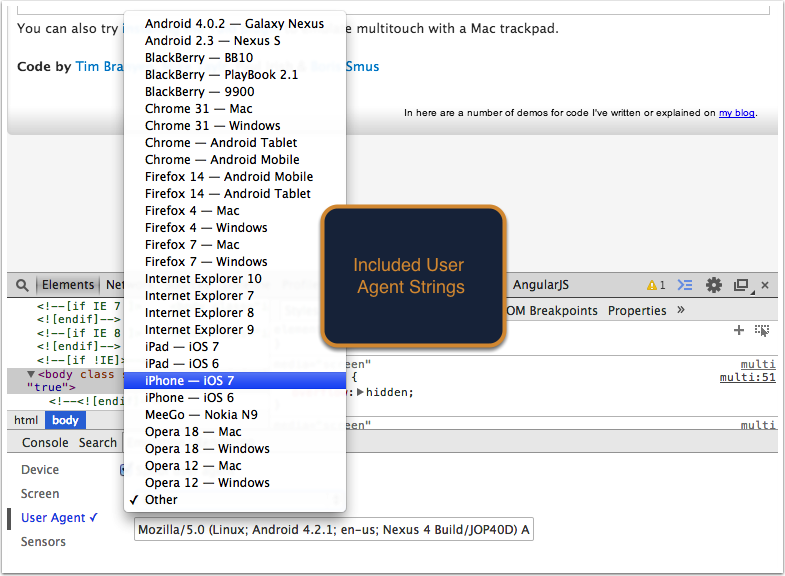
The “User Agent” section allows you to toggle between Chrome’s default User Agent String, which gives accurate information about your browser and your hardware that is set up to the sites you visit. If you use one of the default device presets in the “device” section, Chrome will select and enable the corresponding User Agent from its list. If you want to change the string, do it in the textbox and hit Enter. Check out UserAgentStrings.com as a resource to find strings from your browser version.
Emulation of Sensor Data
The “Sensor” section provides a few very cool settings, though not as frequently needed as others. Only “Emulate touch screen” is enabled by default. Its activation turns your cursor into a semi-transparent circle that helps you keep track of your touch targets.

There is a need for multi touch functionalities, which may be added later. To use this, hold down the SHIFT key, then click and drag, or scroll. You can turn the touch screen option on or off irrespective of any other setting. Some touch events may be added with some of your mouse events. When “Emulate touch screen” is active and you click your mouse, the page will get a touchstart event as well as a mousedown event.
Get Your Normal Browser Back
Once you have finished testing and want to exit the device emulation, just go back to “Device” section and click on the Reset button. You will be immediately redirected to your normal desktop browser. These tools are backup to actual device testing. But as a substitute, they will do nicely.
Zahoor Bhat has over 10+ years of experience as an online editor and media manager. He has worked with major online news and content sites as a media manager. He is well versed with major content management systems and web platforms such as WordPress and social media networks including Facebook, Twitter, Youtube, Google Business, Yelp, Instagram & Linkedin. He is an expert in content creation, proofreading and finally making it live. Being a social media expert, he is able to make relations with social media influencers and make sure to generate leads and grow business via different social media platforms.


